Environments and Acoustics
The Acoustical design functionality of One allows for interactive, real-time design of room acoustics environments for multiple purposes:
- Loudspeaker System Simulation: Loudspeaker system simulations can be performed to determine the performance of a loudspeaker system in a room. By including the room behavior in the calculation, important parameters such as total SPL, D/R ratio, S/N ratio, and STI can be calculated as well as auralized.
- Architectural Acoustics: Real rooms can be analyzed and room acoustic behavior predicted to assist in the design of architectural spaces and associated acoustical treatments. Different surface materials may be applied to these spaces to determine the effect of room treatment or design choices.
- Active Acoustics: Room models may be created for use as Active Acoustics spaces, which may be used for immersive mixing, auralization, or virtual reality using Fulcrum's Venueflex signal processors. Unlike other methods, you are not restricted to pre-made acoustical environents; you are free to create your own acoustical simulations of any room model for synthesis, including a modified version of the room in which the immersive system is to be deployed.
Environments
An environment describes the acoustical behavior of a room model, whether used for loudspeaker system simulation, architectural acoustics, or active acoustics. The room-dependent simulation modes—Total SPL, D/R ratio, S/N ratio, and STI—as well as binaural Room Auralization all draw on the active environment for their reverberation time and noise level. A project can hold more than one environment (for example, Occupied and Unoccupied) so you can evaluate the system under different conditions and switch between them from the Mapping toolbar. You can also used multiple environments to create different artistic soundfields for active acoustics and immersive mixing.
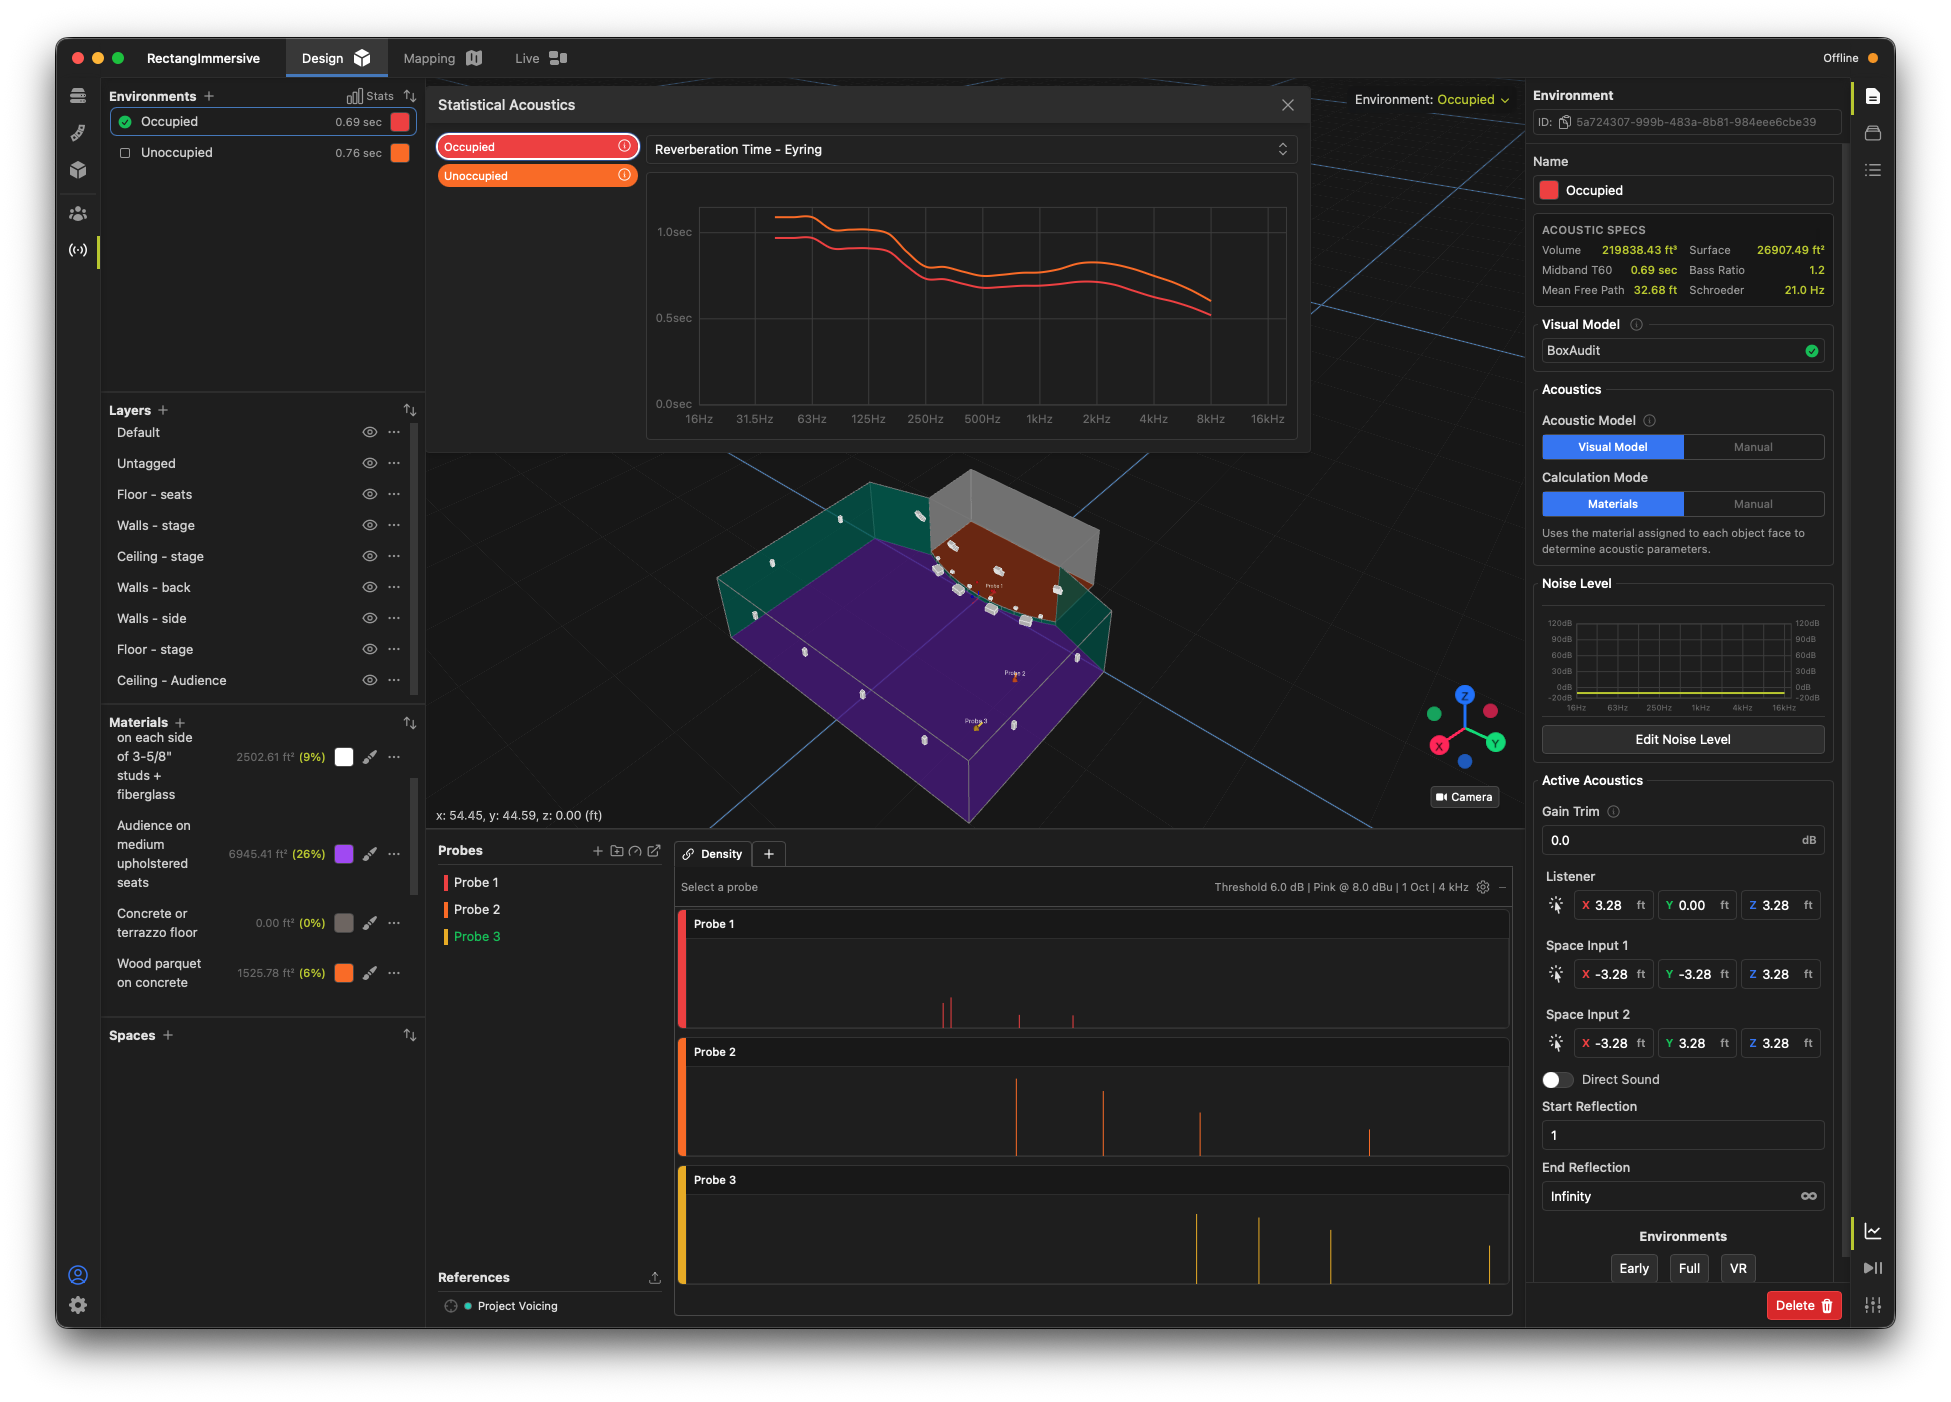
Each environment reports a summary of its key Acoustic Specs, derived using Eyring statistical acoustics:
| Spec | Meaning |
|---|---|
| Volume | Enclosed volume of the room. |
| Surface | Total interior surface area. |
| Midband T60 | Reverberation time (decay of 60 dB) averaged across the mid-band. |
| Bass Ratio | Ratio of low-frequency to mid-frequency reverberation time, a measure of "warmth." |
| Mean Free Path | Average distance sound travels between reflections. |
| Schroeder | The Schroeder frequency, above which the room behaves as a statistically diffuse field. |
Building an Environment
There are two independent choices that define an environment:
- Acoustic Model determines the room's size and shape. Visual Model derives the volume and surface area from the 3D objects you select in the project. Manual lets you enter the dimensions of an equivalent rectangular room directly (length, width, height, volume, and an optional position offset).
- Calculation Mode determines how the reverberation time is found. Materials uses the acoustic absorption of the material assigned to each surface (or a single material, for a manual room). Manual lets you type or draw the reverberation time curve yourself with Edit Reverberation Time.
A Noise Level curve sets the ambient background noise of the space, which feeds the S/N ratio and STI calculations. Edit it with Edit Noise Level; you can then set the estimated or measured noise level or select from common Room Criteria curves.
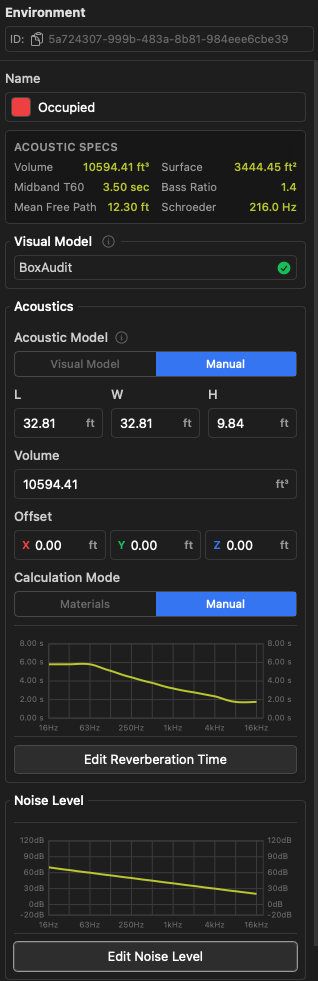
The Acoustic Model and Calculation Mode are independent. You can, for example, use the Visual Model for the room geometry while entering reverberation time Manually, or define a Manual rectangular room whose absorption comes from assigned Materials.
Active Acoustics
When an environment is used to drive an Active Acoustics virtual space, the Active Acoustics section provides additional controls: a Gain Trim for the convolver, Listener and Space Input positions, a Direct Sound toggle, and Start/End Reflection limits that bound which portion of the impulse response is rendered. The Early, Full, and VR buttons apply common combinations of these settings.
Simulating Acoustics with a Room Model
To start the acoustical design process, make sure you've imported a room model using the steps in "Designing in Fulcrum One". Start by selecting the Acoustics toolbox by clicking the  tab on the left side of the screen. It's also helpful to open the Layers list by clicking the
  tab on the right.
 tab on the left side of the screen. It's also helpful to open the Layers list by clicking the
  tab on the right.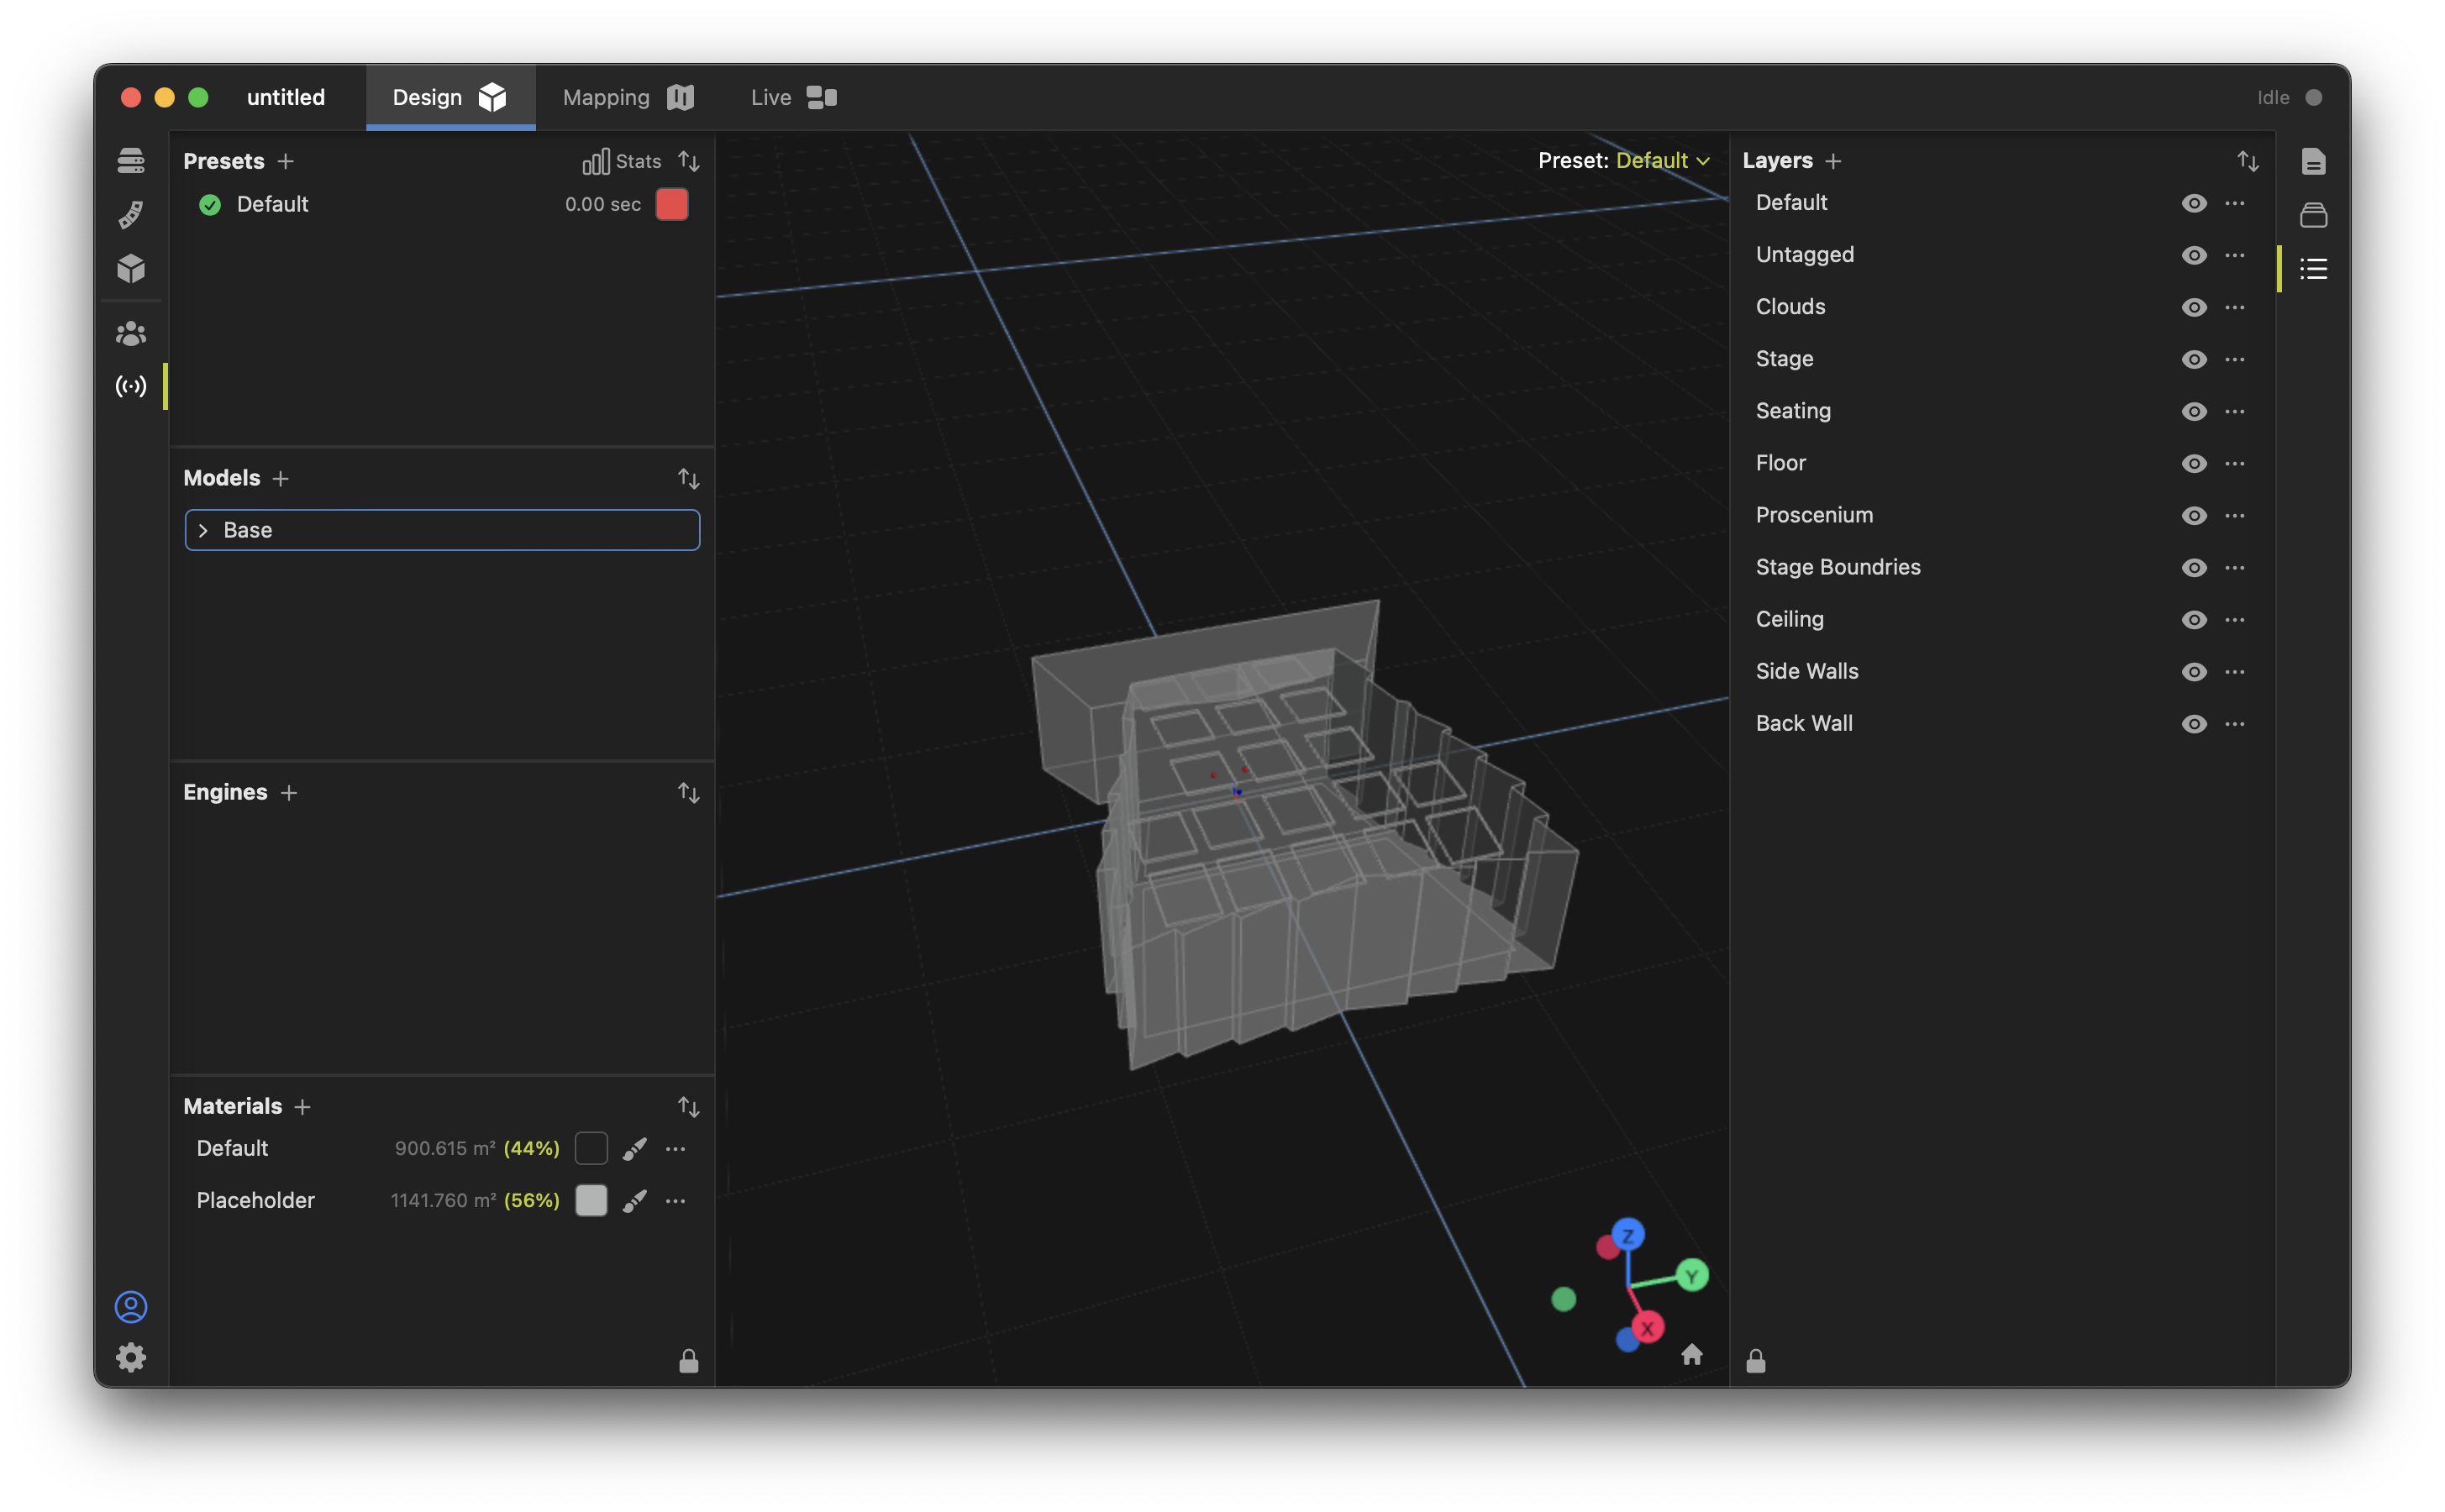
The Acoustics toolbox has several main components:
- Environments: The Environments list contains a list of acoustical configurations, each with independent associated materials and potentially different room models. For architectural design, this is helpful to compare various room treatment or occupancy conditions. For active acoustics, each environment represents a separate sound character that can be used on real-time sources. There is always a default environment.
- Layers: The Layers list shows a set of 3D objects from imported designs. Each layer consists of one or more 3D objects from imported designs. There is always at least one default layer.
- Materials: This list shows available acoustical material types that can be used in the project. Some materials may be present from importing a 3D model; these will require acoustical parameters if they are desired. New materials may be created or imported from One's library by clicking the "+" icon.
- Active Acoustic Spaces: The Active Acoustic Spaces list shows a set of active acoustics spaces that can be used to create immersive sound environments. These are linked to Environments when used for active acoustics.
Adding Materials to the Project
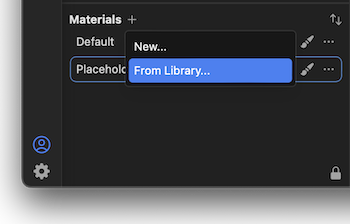
Let's add some material definitions to our project so we can perform an analysis. Click the "+" icon in the Materials list, and select "From Library...".
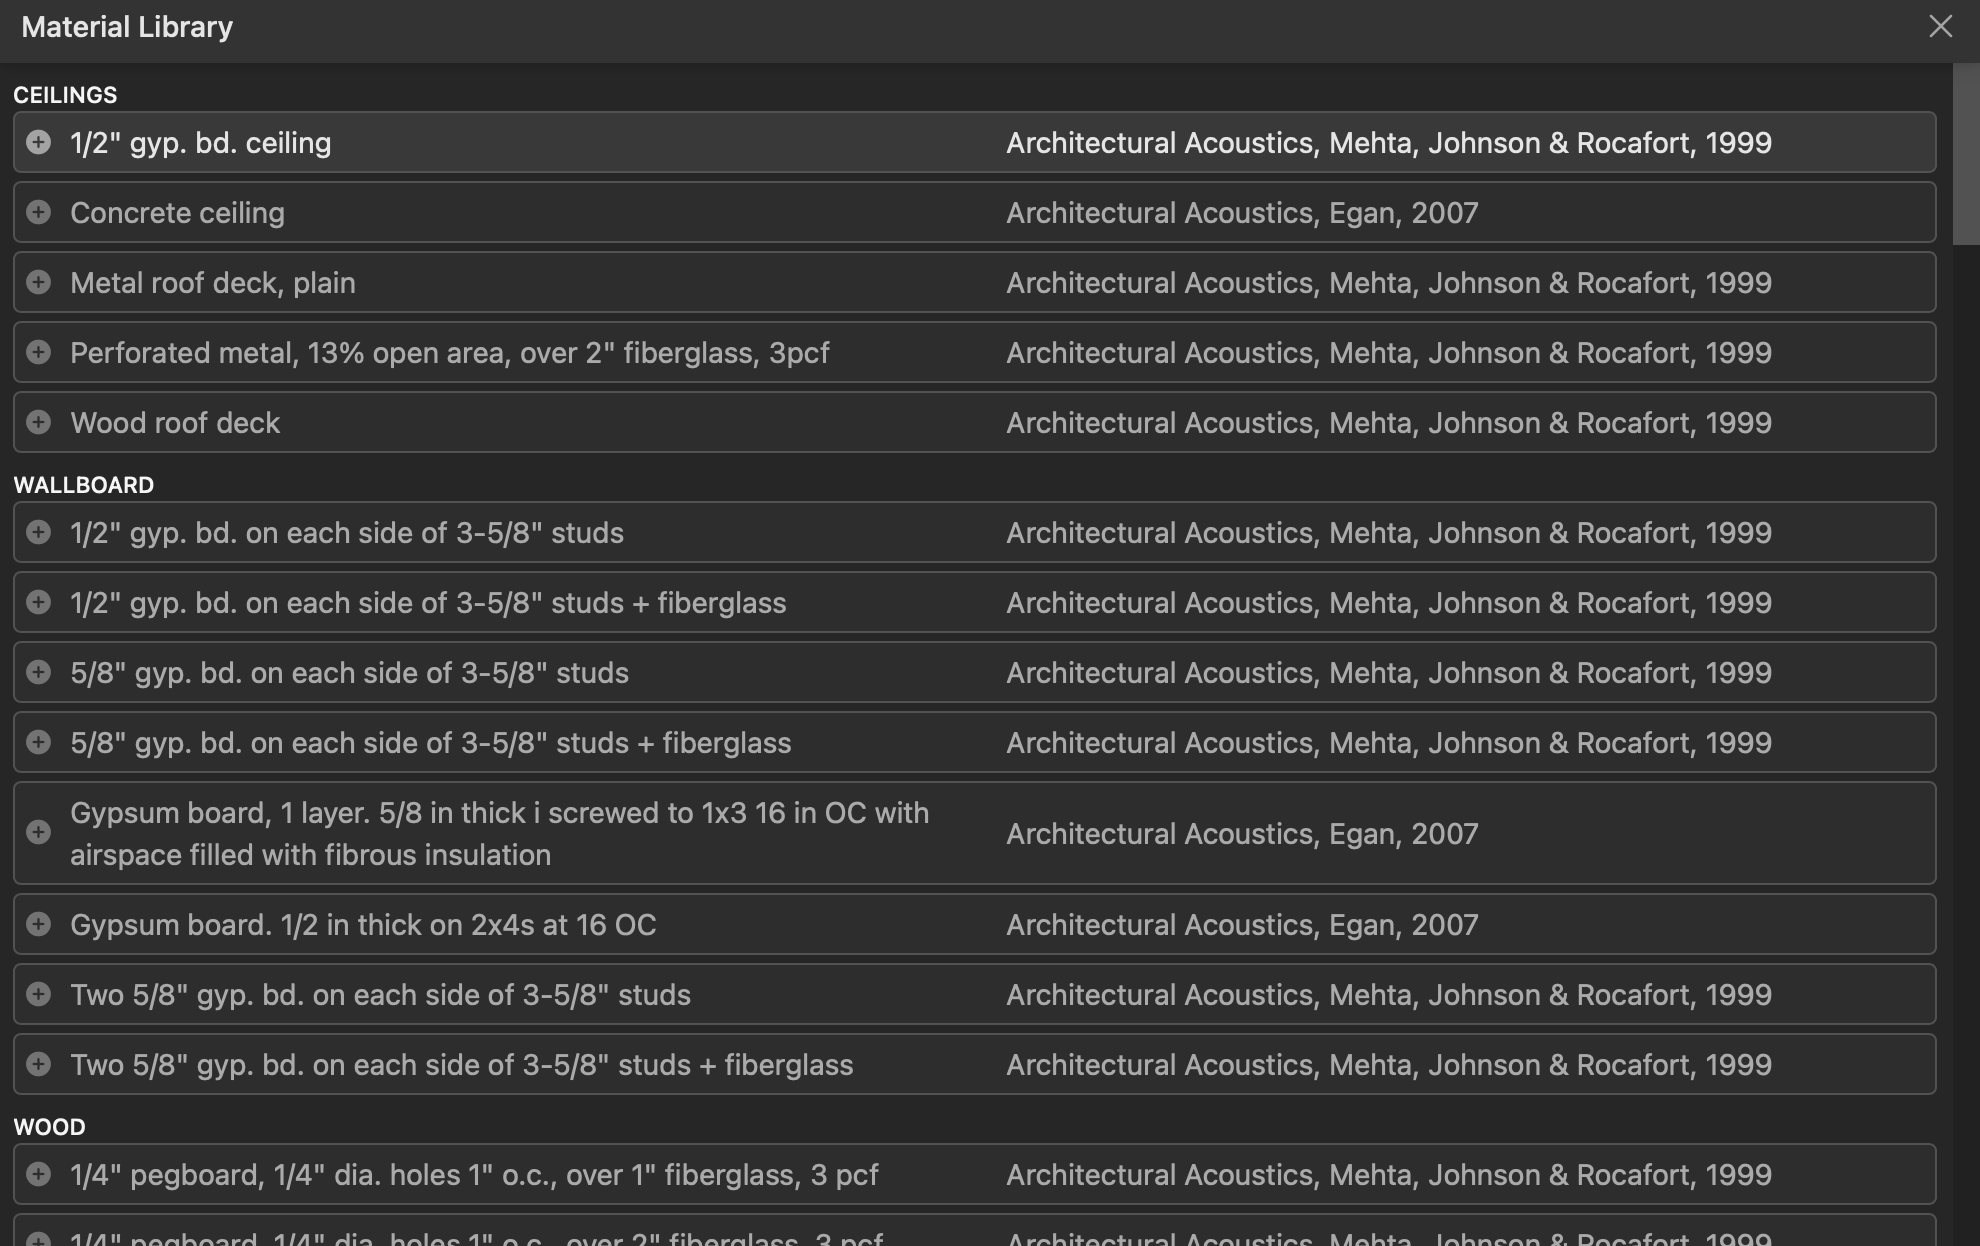
One includes a number of different generic acoustical material definitions that you can use for analysis or creating room simulations. Select from the list to add a predefined material to your project.
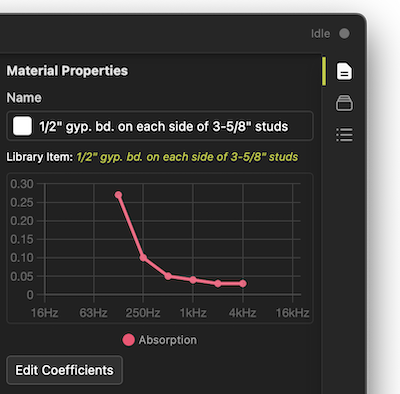
Once a material has been added to the list, selecting it and selecting the Properties tab on the right shows the acoustical parameters associated with that material.
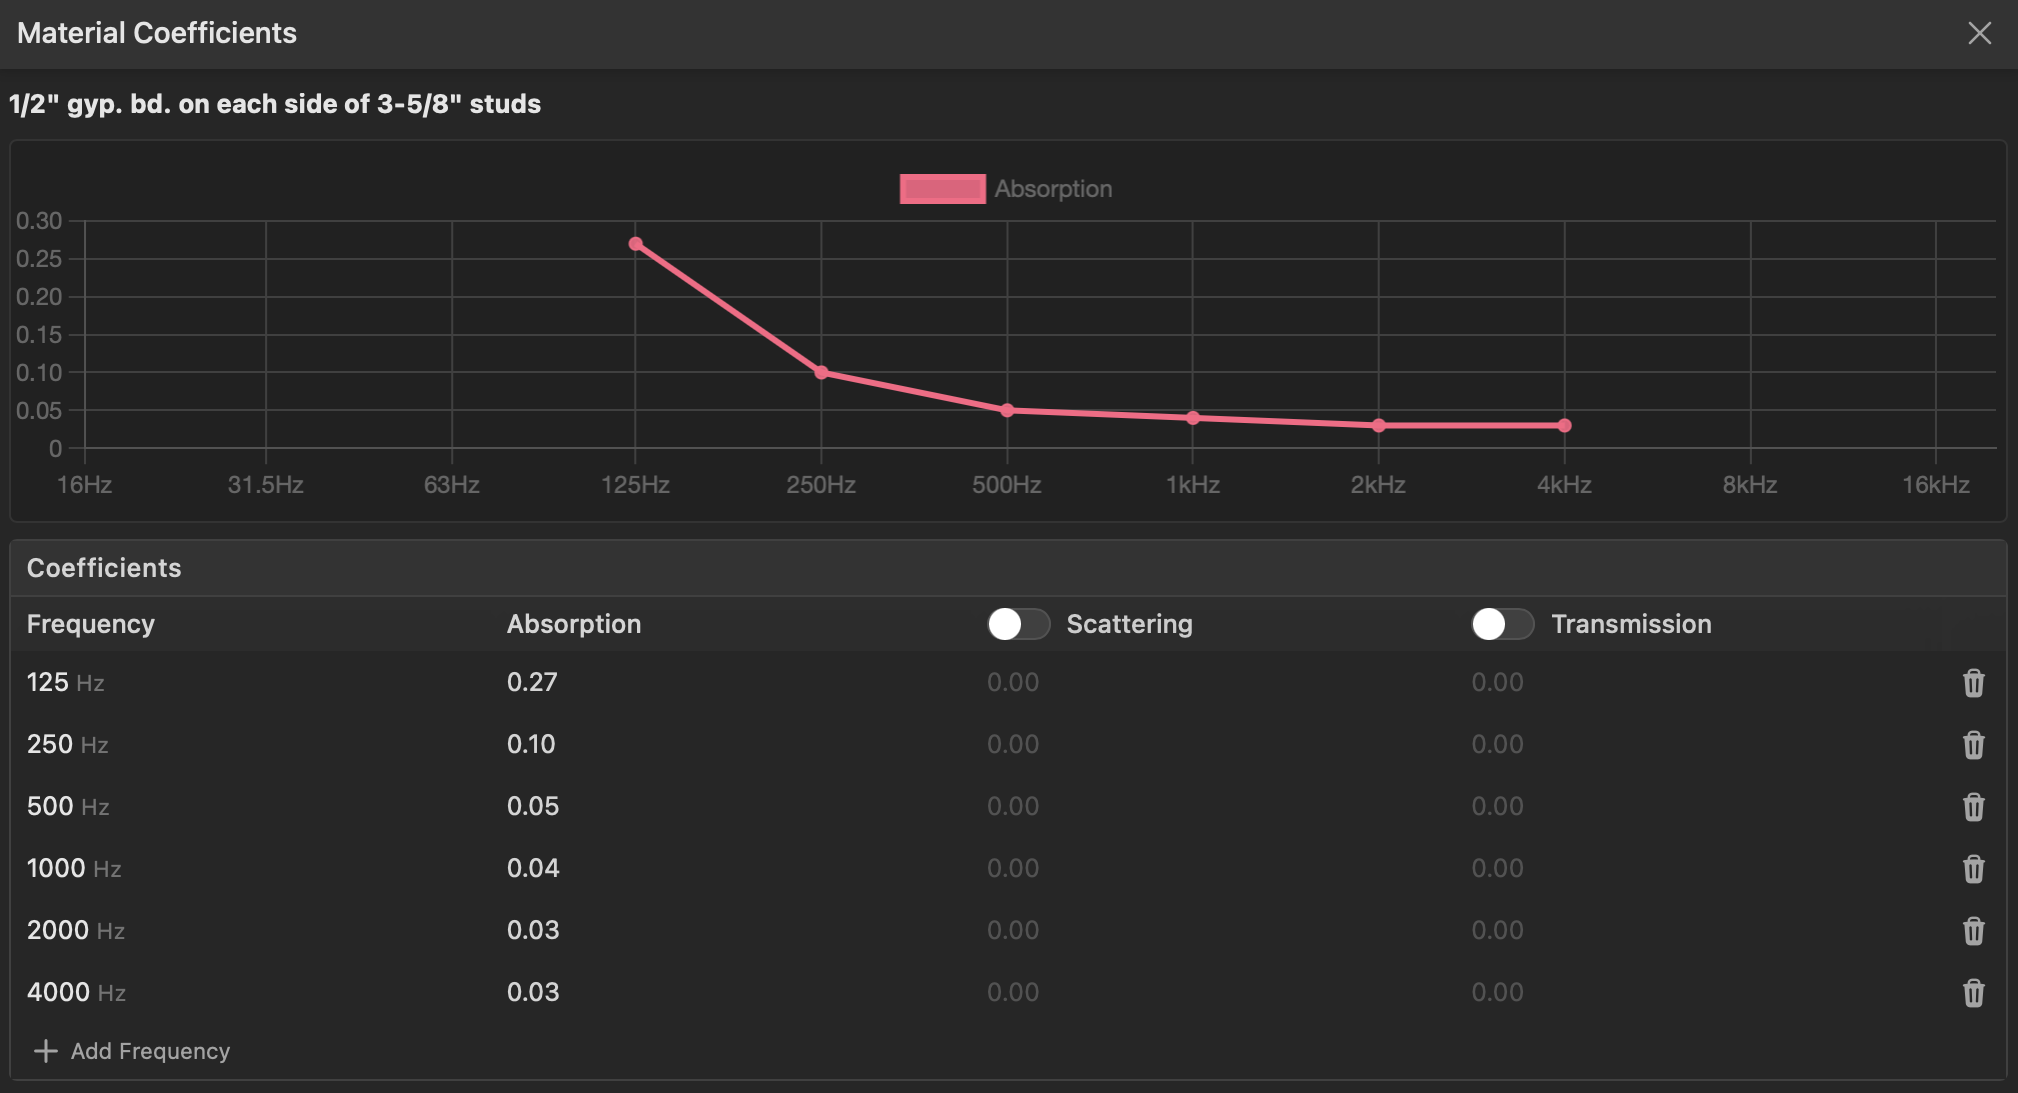
The "Edit Coefficients" button allows you to modify any library-generated or custom materials added to the project. In addition to standard energy-fraction absorption coefficients, you may also assign scattering and transmission coefficients (functionality coming soon). Note that while coefficients may be entered on any desired frequency centers and resolution, most library data includes octave-banded absorption data.
Assigning Materials to the Model
Materials may be assigned to the model by clicking the  icon beside the material. This will allow you to paint the material either directly onto a face in the model or onto a layer.
 icon beside the material. This will allow you to paint the material either directly onto a face in the model or onto a layer.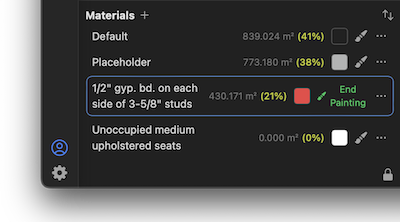
Click a face in the model to assign this material to it.
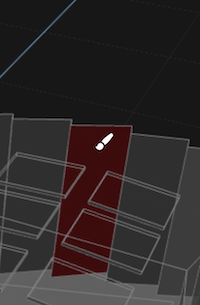
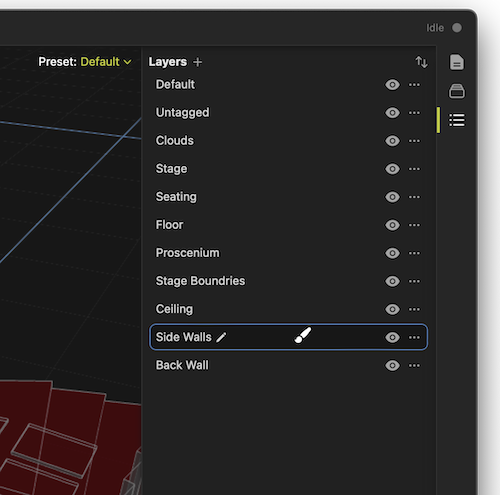
Painting a material onto a layer will assign that material to all faces on the selected layer. Open the Layers list on the right by clicking the icon. Click a layer to assign with the paintbrush.
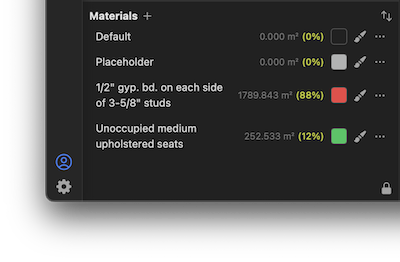
As you assign materials, a running total of the assigned surface area and the percentage of assigned surface area are shown in the Materials list.
Acoustical Calculations
As you assign materials, the Environments list updates to show you the resulting "mid-band" reverberation time for the current environment.
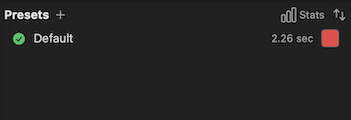
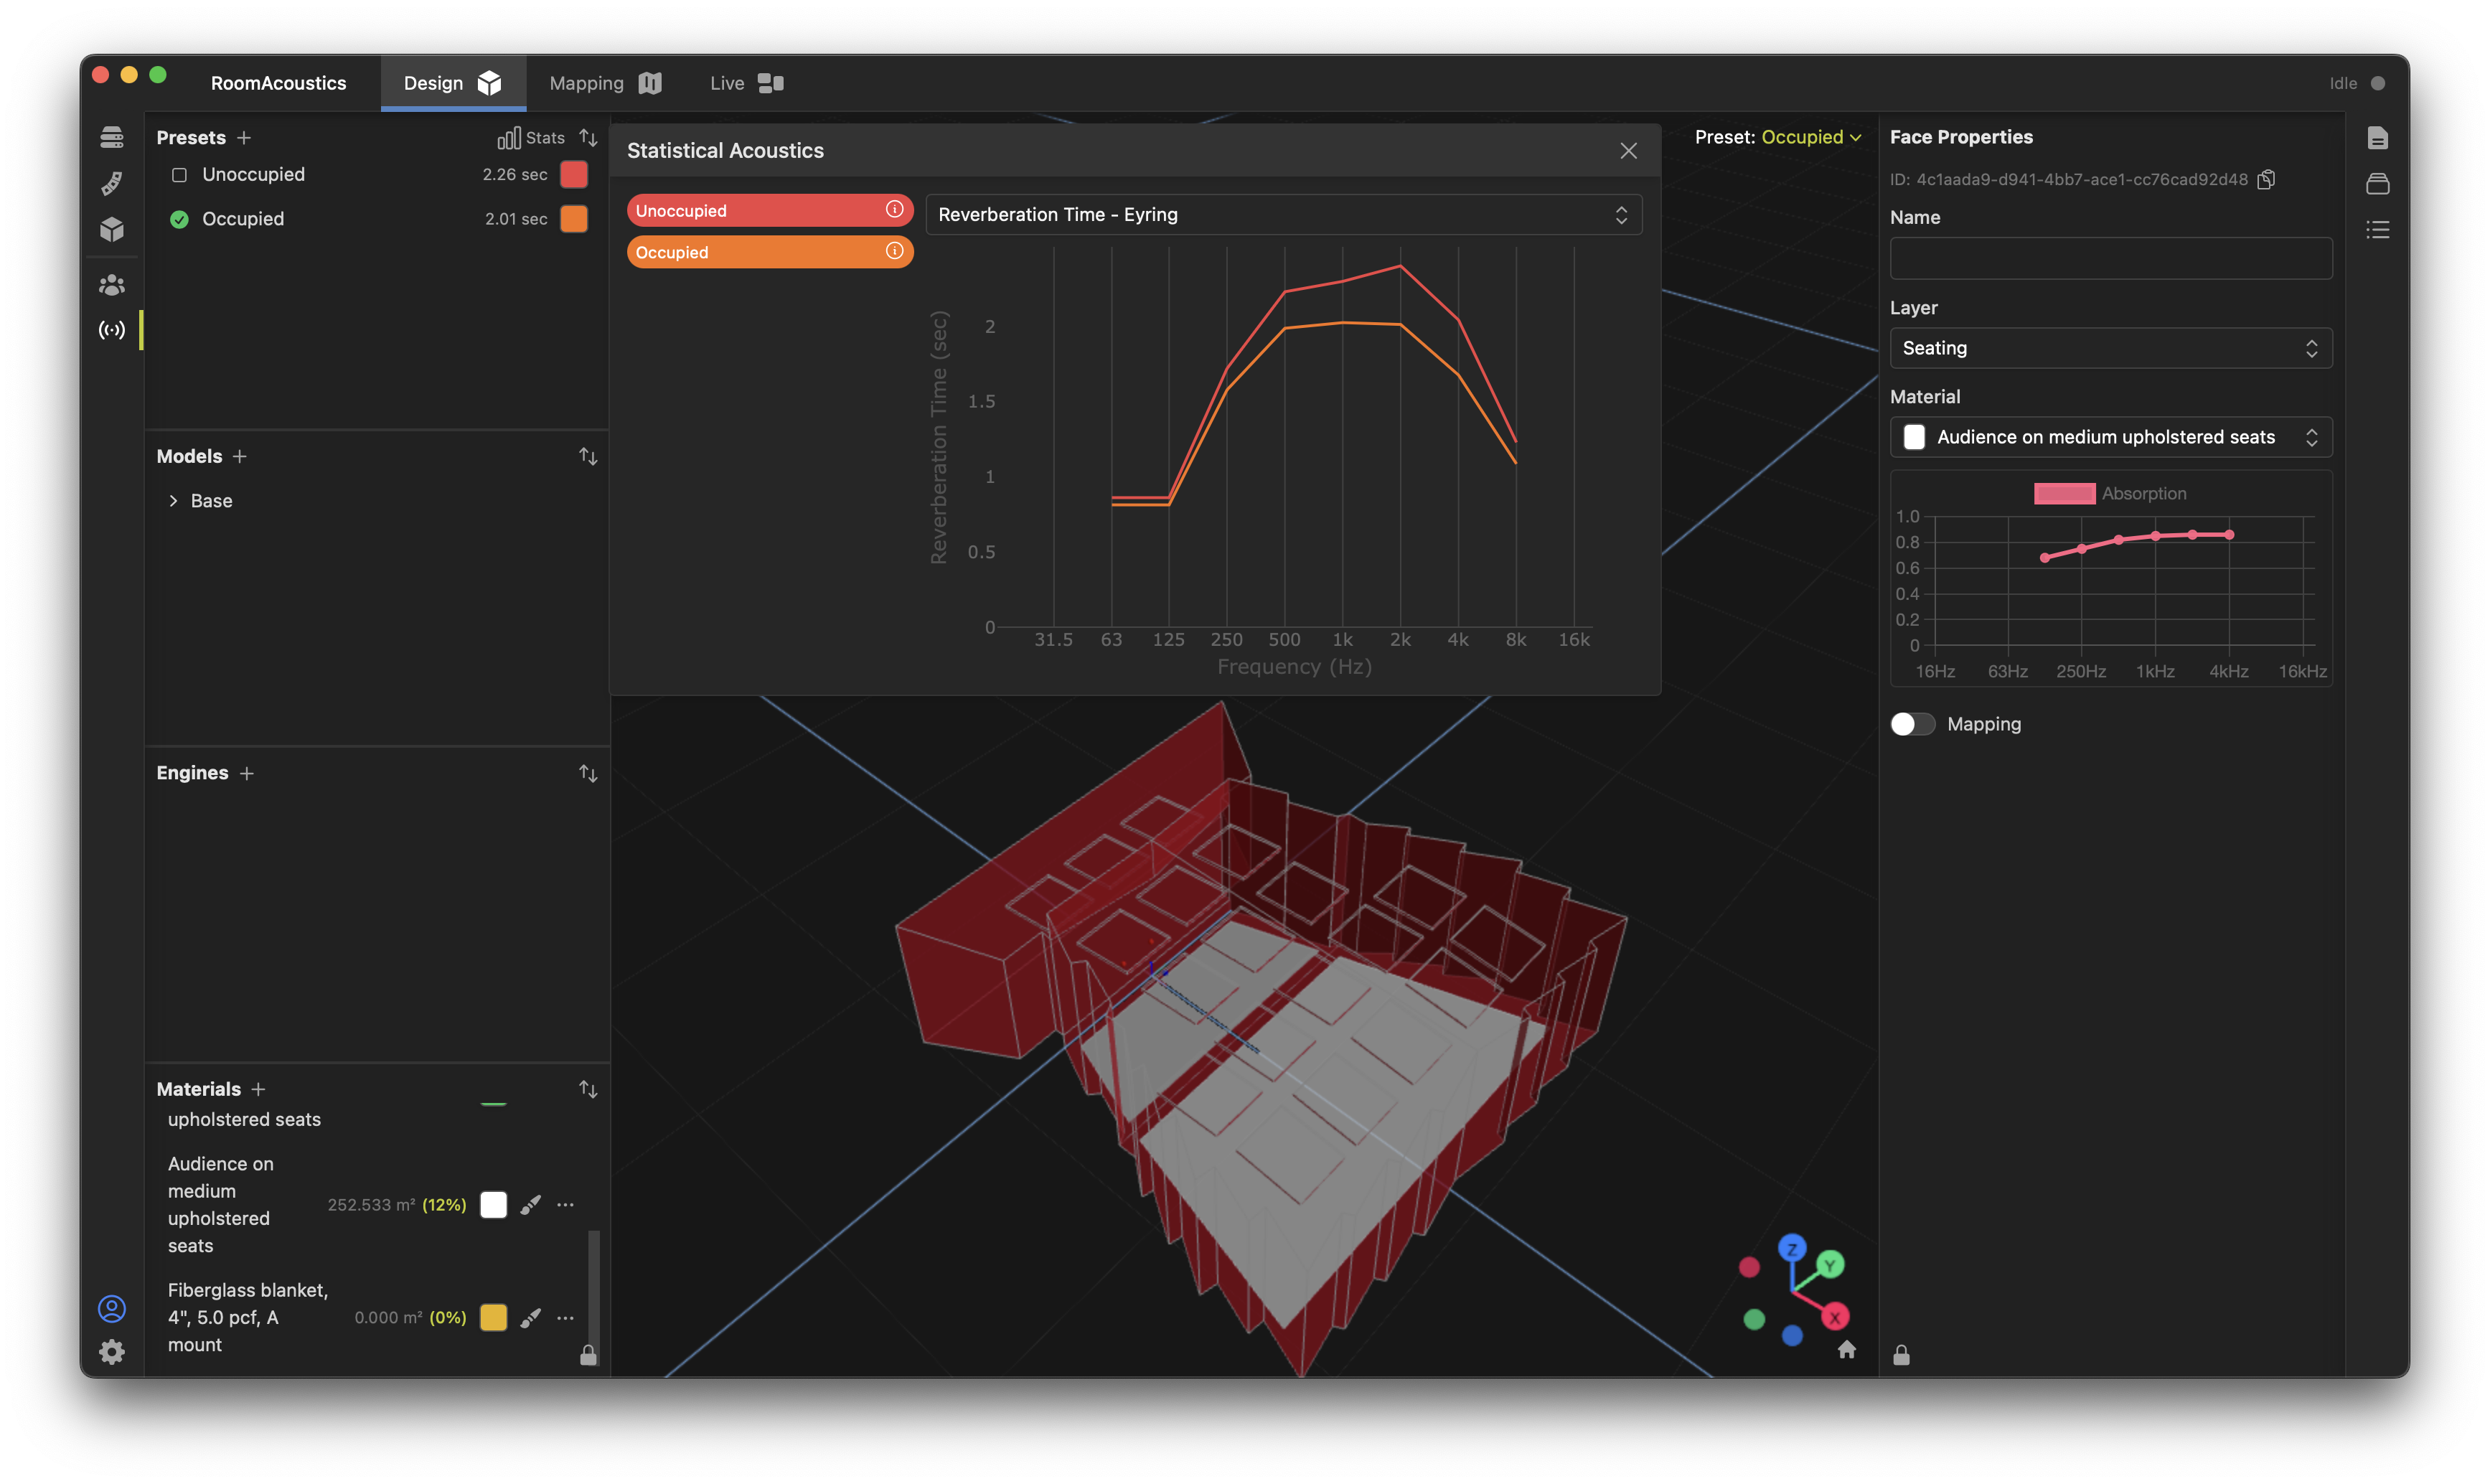
Click the  button to open the Statistical Acoustics panel, which shows acoustical data in spectrum form, plus additional statistics. The drop-down box allows you to see acoustical results representing the following spectra:
 button to open the Statistical Acoustics panel, which shows acoustical data in spectrum form, plus additional statistics. The drop-down box allows you to see acoustical results representing the following spectra:
- Reverberation Time - Eyring: This is the statistical reverberation time versus frequency using the Eyring formula including projected air absorption, which is generally applicable to nearly all rooms.
- Reverberation Time - Sabine: This is the statistical reverberation time versus frequency using the Sabine formula including projected air absorption, which is typically most accurate with rooms with lower total absorption.
- Surface Absorptive Area: This is the equivalent absorptive area, meaning the average absorption coefficient multiplied by the total surface area. This value represents only the face surface material behavior and does not include air absorption.
- Surface Average Absorption Coefficient: This is the average sound absorption coefficient over the entire model, weighted by face surface areas. This value represents only the face surface material behavior and does not include air absorption.
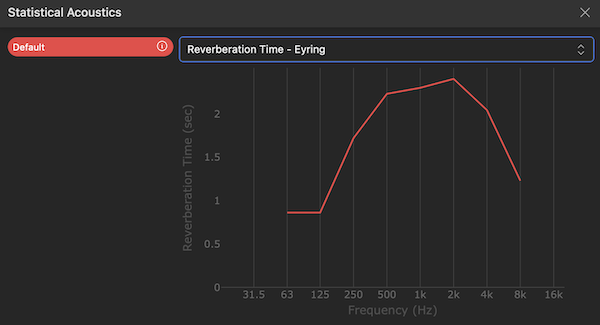
The graph will show all Environments in the model; hover over the  icon to see additional statistics about that specific model.
 icon to see additional statistics about that specific model.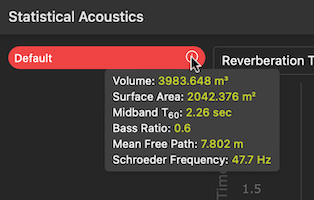
Statistics available include:
- Volume: This is the total room volume enclosed by all objects making up this room model. Note: the room model must be fully closed for this statistic, and therefore all calculations, to be accurate.
- Surface Area: Total surface area represented by all models in this environment.
- Midband T60: Mid-band reverberation time calculated by the average of the Eyring reverberation times in the 500Hz and 1kHz octave bands.
- Bass Ratio: Ratio of the average low frequency reverberation time (125Hz and 250Hz bands) to mid frequency times (500Hz and 1000Hz bands), using the Eyring formula.
- Mean Free Path: The estimated average path length between adjacent reflections for one outgoing wavefront in the room.
- Schroeder Frequency: The estimated frequency below which the room exhibits primarily modal behavior and above which the room exhibits primarily diffuse reflections.
Using Multiple Environments
Up to now, we've looked at an acoustical analysis using just one environment and one model. However, we can create multiple environments representing different acoustical material conditions, or even referencing different 3D models for both comparison purposes or for use in active acoustics and auralization.
Let's rename the existing Default environment to Unoccupied by clicking the  icon beside the name. Next, add a new environment using the + icon. You'll note that the currently selected environment is duplicated. Rename the new environment to "Occupied" and select it using the
  icon.
icon.
 icon beside the name. Next, add a new environment using the + icon. You'll note that the currently selected environment is duplicated. Rename the new environment to "Occupied" and select it using the
  icon.
icon.Now that the new environment is selected, we will change some materials to show the differences. In this case, we will paint in an "Occupied" seating material where the "empty" seating material was in the first environment. Now we can quickly compare those results and see the performance differences.